This page created 5 May 2009
Version note: Applies to Second Site 6 & 7
This article describes how to add content – text, images, charts, maps, calendars, and much more – to the Main Page of your site, or to Custom Pages you create for it. The Main Page and Custom Pages are described in my Second Site Overview article. Other articles in my Second Site Section cover other topics about customizing your site.
|
Topics Included in this Article |
|
| Typing content directly into Main or Custom Pages | |
| Creating content by use of Content Items | |
| An example of creating page content using the "building block" method | |
| Dressing up a list of items | |
There are two different methods for adding content to your Main Page and to any Custom Pages you create – Direct Entry and the "building block" method. Both are described in the following sections. The Direct Entry method is a good starting point, and is easiest for adding simple content, but quickly gets more challenging if you want to add more complex content. Which you should choose depends on exactly what you want to add, and may be influenced by your skill level, if any with HTML. With some restrictions, you can mix the two methods on any given page.
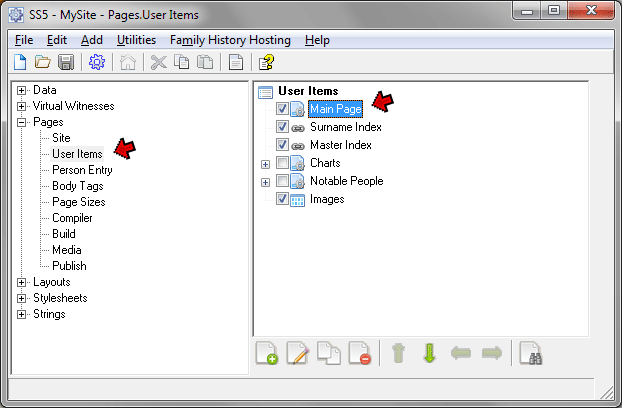
With this method you type the content directly into the Main Content field of the Edit Custom Page screen. This is a simple and direct approach if you want to enter only simple text. You open the Edit Custom Page screen from the Pages > User Items section. Double-click the User item you want to edit, or select it and click the Edit button.
The Edit Custom Page screen opens. Shown below is the edit screen for the Main page of the simple site illustrated in my Second Site Overview article:
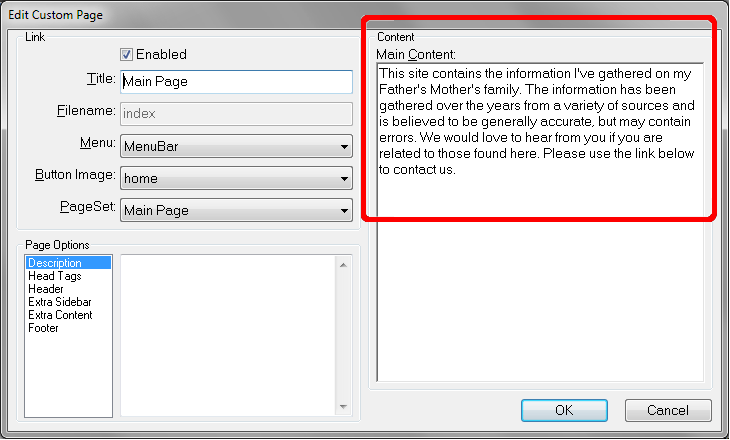
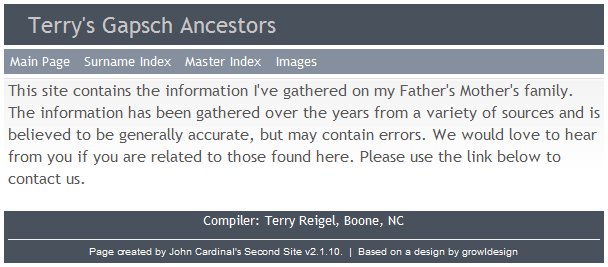
Here I simply typed my text into the Main Content field. That might produce the following Main Page:
If your content consists of more than a single paragraph of text the operation becomes a slight bit more complex. That is because the contents this field is actually HTML – the language of web pages. Therefore using the Enter key does not create a new paragraph as it does in a word processor, and other familiar formatting techniques do not work in this field. But there is a simple solution provided. Click in the Main Content field, and press F7 to open the HTML editor:
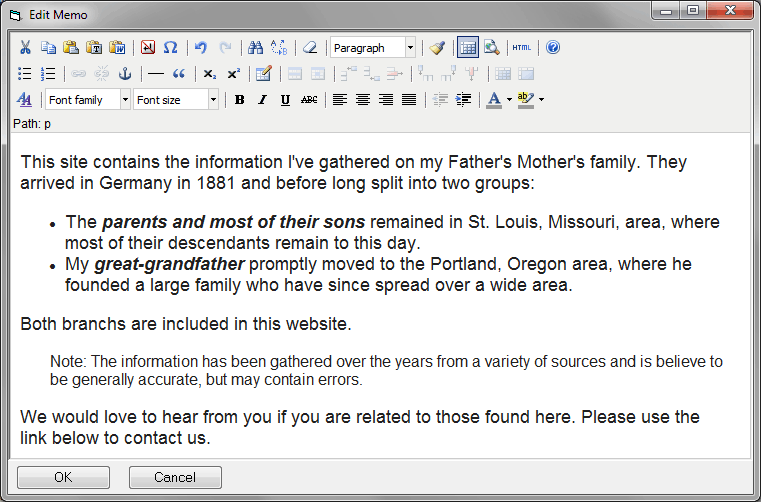
Using the HTML editor, I was able to easily break the text into paragraphs, add a bulleted list, and apply font formatting. The toolbar buttons allow many editing operations that will be familiar to users of word processors.
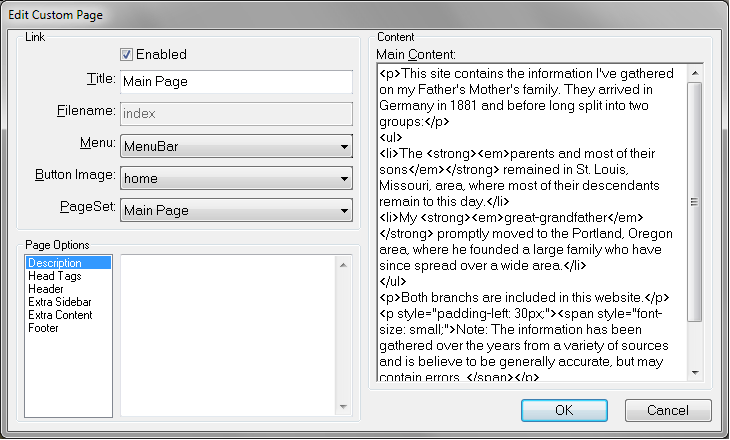
For those who are interested, you might notice that when you close the HTML Editor, the codes it inserts are visible in the Main Content field of the Edit Main Page screen:
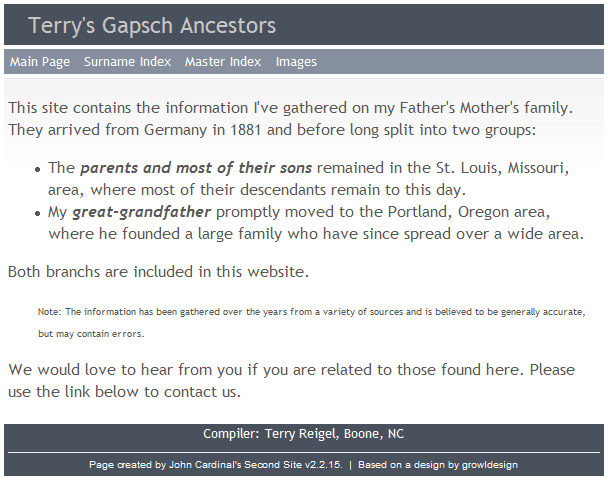
The resulting Main Page might look like this:
What if you want to include elements that cannot be easily added with the HTML Editor, such as photos, charts, maps, or other advanced features? There are two methods available. If you have sufficient knowledge of HTML, you can enter the necessary coding manually. Or, you can use the "Building Block" method described in the next section.
Those with a knowledge of HTML may choose to compose in a Text Editor rather than use the HTML Editor. A Text Editor is available, and is opened by holding the Shift key while pressing F7 to open the editor. If you generally want to use Text Editor instead of the HTML Editor, you can make it the default editor using the File > Preferences > Default Editor menu command. If you do that and occasionally want to use the HTML Editor, Shift-F7 will open it.
Second Site has a second and very powerful method for creating content in your Main Page or in Custom Pages. I call that method the "Building Block" method because it allows you to create the page content piece-by-piece, using a series of "Content Items," much like a child constructs a toy building with building blocks. This approach that allows you to assemble quite complex pages with no knowledge of webpage languages.
With this method, you attach a series of Content Items to the Main Page or Custom Page User Item. You sequence those Content Items in the order you want them to appear in the page. The Content Items designed specifically to serve as these "building blocks" include:
Content Item - Text Creates a section of text Content Item - Picture Inserts an image Content Item - Map Adds a Map – see Adding Maps to Your Site Content Item - Calendar Adds a Calendar showing events for people included in the site Content Item - Slideshow Adds a Slideshow of images you provide Content Item - Search Form Sets up a Search feature for your site Content Item - DNA Grid Displays Y-DNA test results Content Item - Heading Inserts a section heading to divide other items Content Item - List Type Converts a list of other items to bulleted or numbered items Content Item - Table Row Creates a row in a table Content Item - Icon Description Creates a description of an icon used in the site
In addition to these items created specifically as Content Items, these types of User Items can be used as building blocks in the Main Page or a Custom Page
Chart Either inserts a chart into the Main or Custom Page, or inserts a link to a chart that is on its own page. Which is done depends on the setting of the "Item Class" on the Edit Chart screen. Setting that property to "Page Item" causes a separate chart page to be created and a link to it to be inserted. Setting it to "Content Item" causes the chart to appear within the page. Link
Causes a link to a person or to another page to be inserted.
Index
Creates an Index on a separate page, and inserts a link to it in the Main or Custom Page.
Exhibit Gallery
Creates an Exhibit Gallery on a separate page, and inserts a link to it in the Main or Custom Page.
Custom Page
Creates an a separate Custom Page, and inserts a link to it in the Main Page or this Custom Page.
Using this method you can easily create quite complex pages with a number of components. For example, this page was created by adding five User Items to the Main Page:
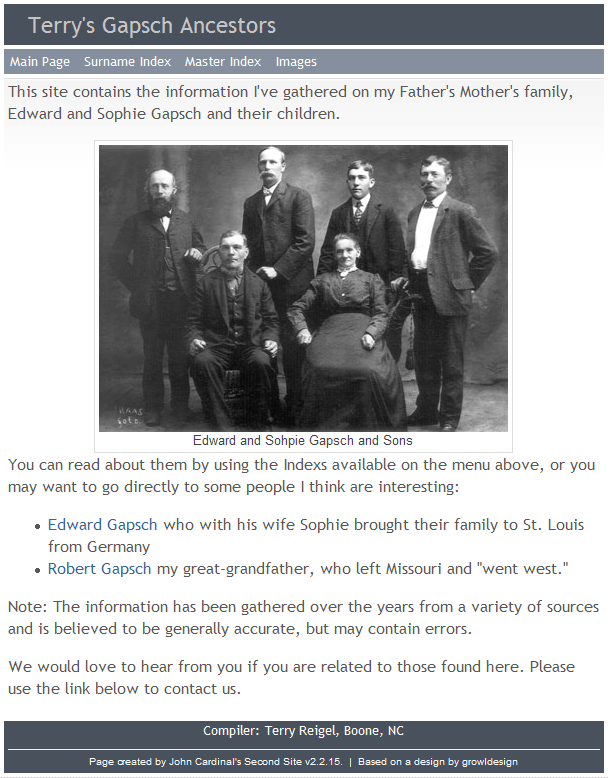
The next section explains how it was created.
Creating Content with the use of these building blocks is straightforward. Because the first item I wanted on the Main Page was a paragraph of text, I just typed that into the Main Content field of the Main Page User Item, as described at the beginning of this article.
Then I added other components by adding User Items one-by-one. To do that, in the Pages > User Items section select the Main Page or Custom Page User Item into which you want to add content, and click the Add button to open the list of User Items:
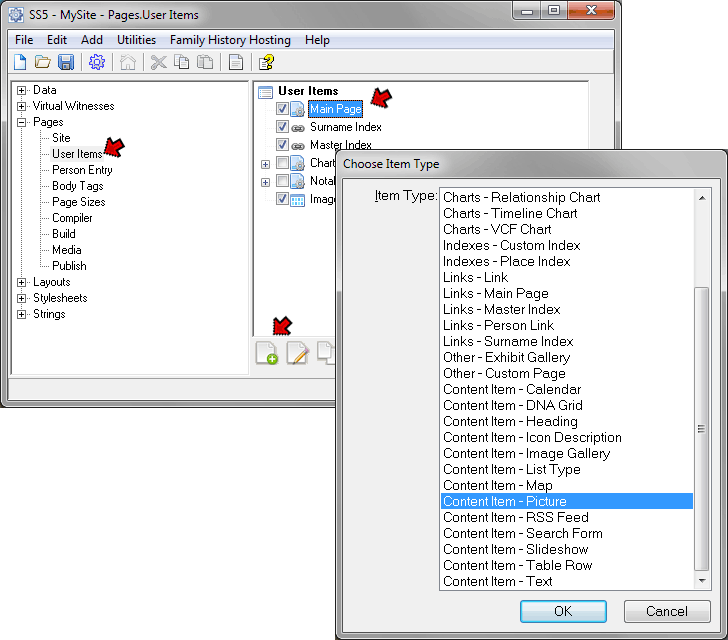
Here I have selected a Picture Content Item to add a photograph to my Main Page. When you click the OK button, you see the Edit Picture screen:
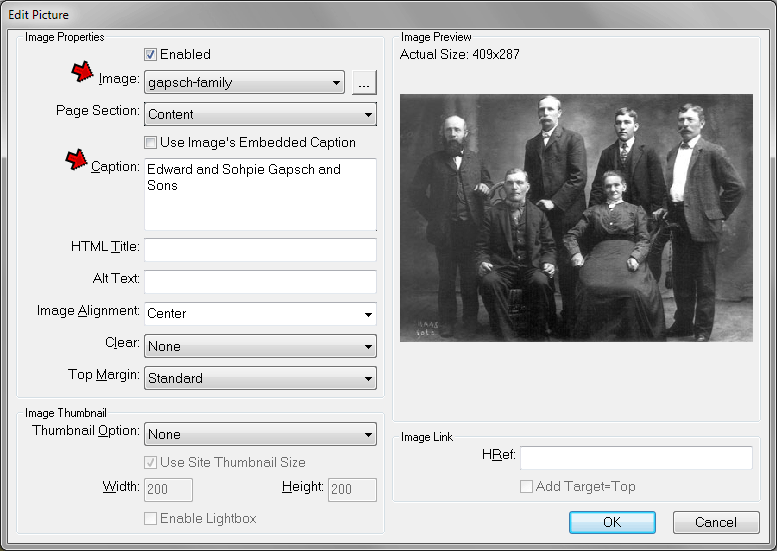
Here I have selected the image I want to include, which then appears as a preview on the right of this screen. You can copy the image to the "-i" folder before you open this screen, in which case you can select it from the drop-down list in the Image field. Or, you can use the [ ... ] button to find it elsewhere on your computer, and Second Site will place a copy of it in the "-i" folder for you.
I have also added a caption for the photo in the Caption field. The Picture Content Item has many other useful features as well. Press the F1 key while this screen is open to read the complete description in Help.
I then added some text below the photo by again selecting the Main Page User Item and clicking the Add button. This time I selected a Content Item - Text, which opens the Edit Text screen:
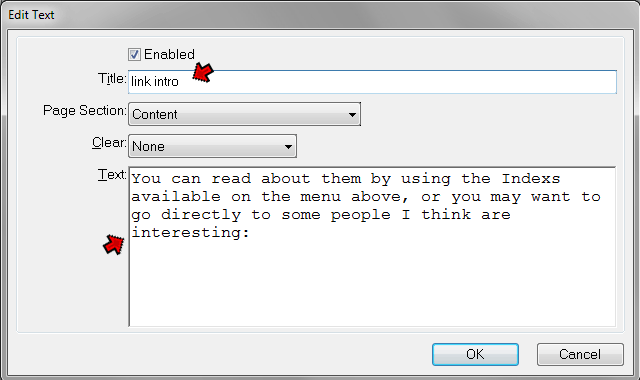
In this screen I entered a Title, which is required but is only used in the list of User Items. So you can enter anything that is descriptive of the section of text you are creating. Then I typed the text I wanted to appear in the Text field.
Next I wanted to add two links to specific people that I thought might be of interest to readers, so they can read about these people without having to use the Indexes to find them. Do that by again selecting the Main Page User Item and clicking the Add button. This time I selected a Links - Person Link item, which opens the Edit Person Link screen:
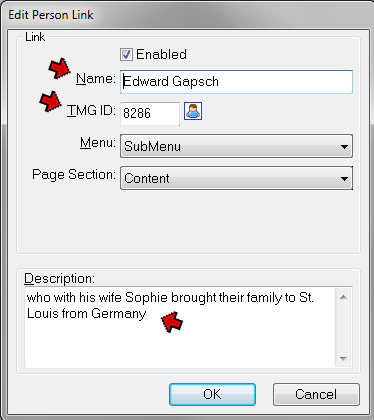
Here I entered the person's name and TMG ID Number. Then I added a short explanation to help the reader understand why this person might be of interest in the Description field.
After adding the second link, I added another Text Content Item to place some closing text at the bottom of the page. In this case I wanted two separate paragraphs of text, so in the Edit Text screen, I placed the cursor in the Text field and pressed F7 to open the HTML Editor, as described in the Direct Entry section above. I could then easily create separate paragraphs by simply using the Enter key as I would in a word processor.
When I was done, the User Item screen looks like this:
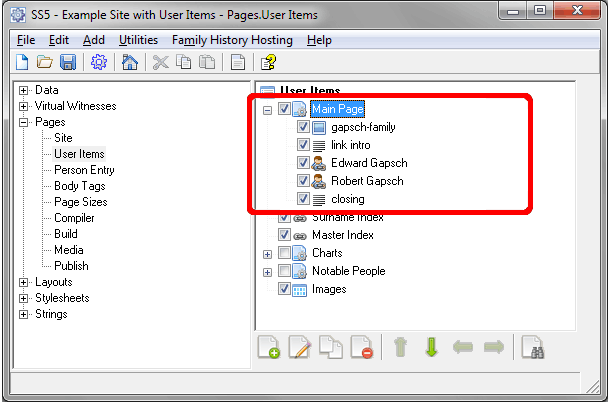
Notice that each of the Content Items I added are shown subtending the Main Page User Item, and appear in the order their output is to appear in the finished page. You can change their positions by dragging and dropping with your mouse, or by selecting them and using the arrow buttons below to move them.
When you include a list of items in the text of your Main Page or a Custom Page there are several tools you can use to manage the layout of the list. Some methods for doing that are described here, using as an example a list of links to "Special People" as one might create on a Custom Page. The methods depicted can be used for any list you create in the Main Page or a Custom Page, whether the list items are links, text, or something else. But if just plain text, formatting by use of the HTML Editor (see above) will likely be easier.
If you want to break the list into sections with headings, as I did with the Special People index in my Sample site, you can add custom page headings. To do that, click the Add button as above, and select Content Item - Heading to open the Edit Heading screen:
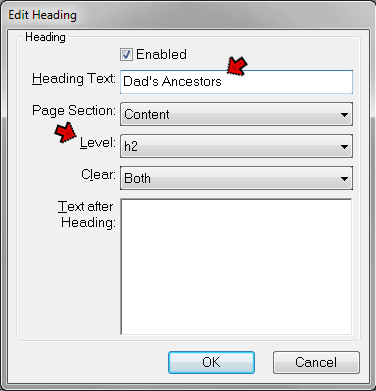
I entered the heading text I wanted to appear in the Heading Text field. You can adjust the format of the heading as it appears in the index by choosing a different setting in the Level drop-down, but the default value is generally fine.
Click OK to create the heading, and adjust it's position in the list if needed by dragging with the mouse or selecting it and using the Up an Down arrows to position it properly.
The appearance of the individual person entries on the index page can be modified if desired by adding a List Type User Item. It is created by using the Add button as above, and choosing the Content Type - List Type item. When we do that the Edit List Type screen appears:
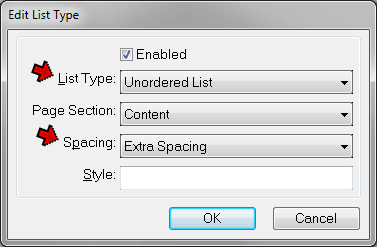
Two controls on this screen are of particular interest. The List Type drop-down offers three choices to format the individual items in the list:
Unordered List produces a bullet-style list something like this:
Frank Alexander – A turn-of-the-century Methodist minister in Virginia and Tennessee.
John Alexander – Farmed land deeded to him by Gov. Sevier, first governor of Tennessee.
- John Woods – Our earliest known Woods ancestor.
Ordered List produces a numbered list something like this:
Frank Alexander -- A turn-of-the-century Methodist minister in Virginia and Tennessee. John Alexander -- Farmed land deeded to him by Gov. Sevier, first governor of Tennessee. John Woods -- Our earliest known Woods ancestor. Definition List produces a list something like this:
- Frank Alexander
- A turn-of-the-century Methodist minister in Virginia and Tennessee.
- John Alexander
- Farmed land deeded to him by Gov. Sevier, first governor of Tennessee.
- John Woods
- Our earliest known Woods ancestor.
The Spacing drop-down allows you to add more space between the items if you prefer.
The following screenshot shows the finished list of User Items one might use to create a Special People index:
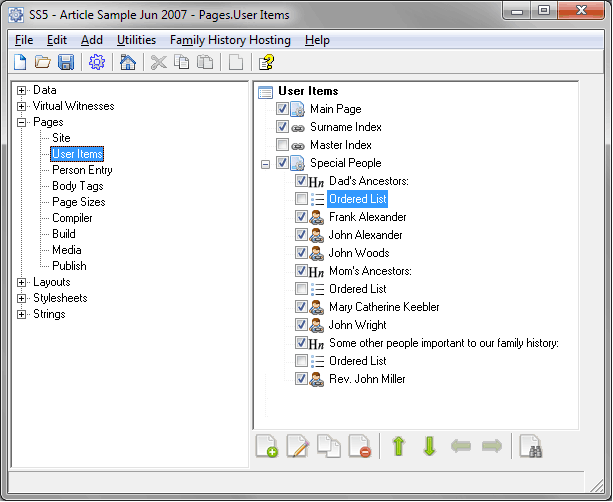
In this example I have created three Headings for the three sections of the index list, and added List Type items to format the lists of people as I wanted. Note that when you interrupt the list with headings a new List Type item is required to format the next section, so there is one after each Heading. The results might look like the following:
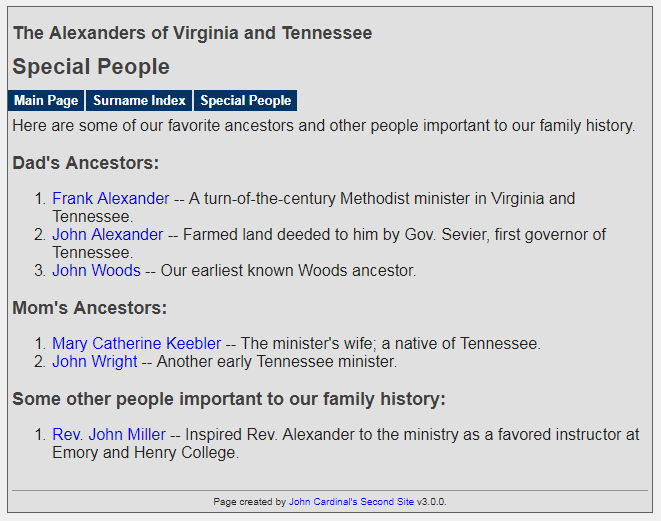
For this application you may prefer an unordered list, with bullets instead of numbers. If so, you could specify an unordered list in the List Type User Items, but you could just omit the List Type Items entirely. The Person Link Items will produce an unordered list by default.
This article provides some insight into the methods available to create a wide variety of content in the Main Page of your website, or in any Custom Pages you may choose to add to your site. Whether you want only a few simple lines of text, or a creative mix of text, photos, links, and more, tools are available to create what you have in mind.
| ReigelRidge Home | Terry's Tips Home | Contact Terry |
Copyright 2000- by Terry Reigel